Settings
The Settings menu (top right of the dashboard) gathers everything you configure once and rarely touch again. This page walks through each area. The menu lists them as Dashboard, Auth, Primer, Curator, Tokens, Connect, Captures, and Backups.
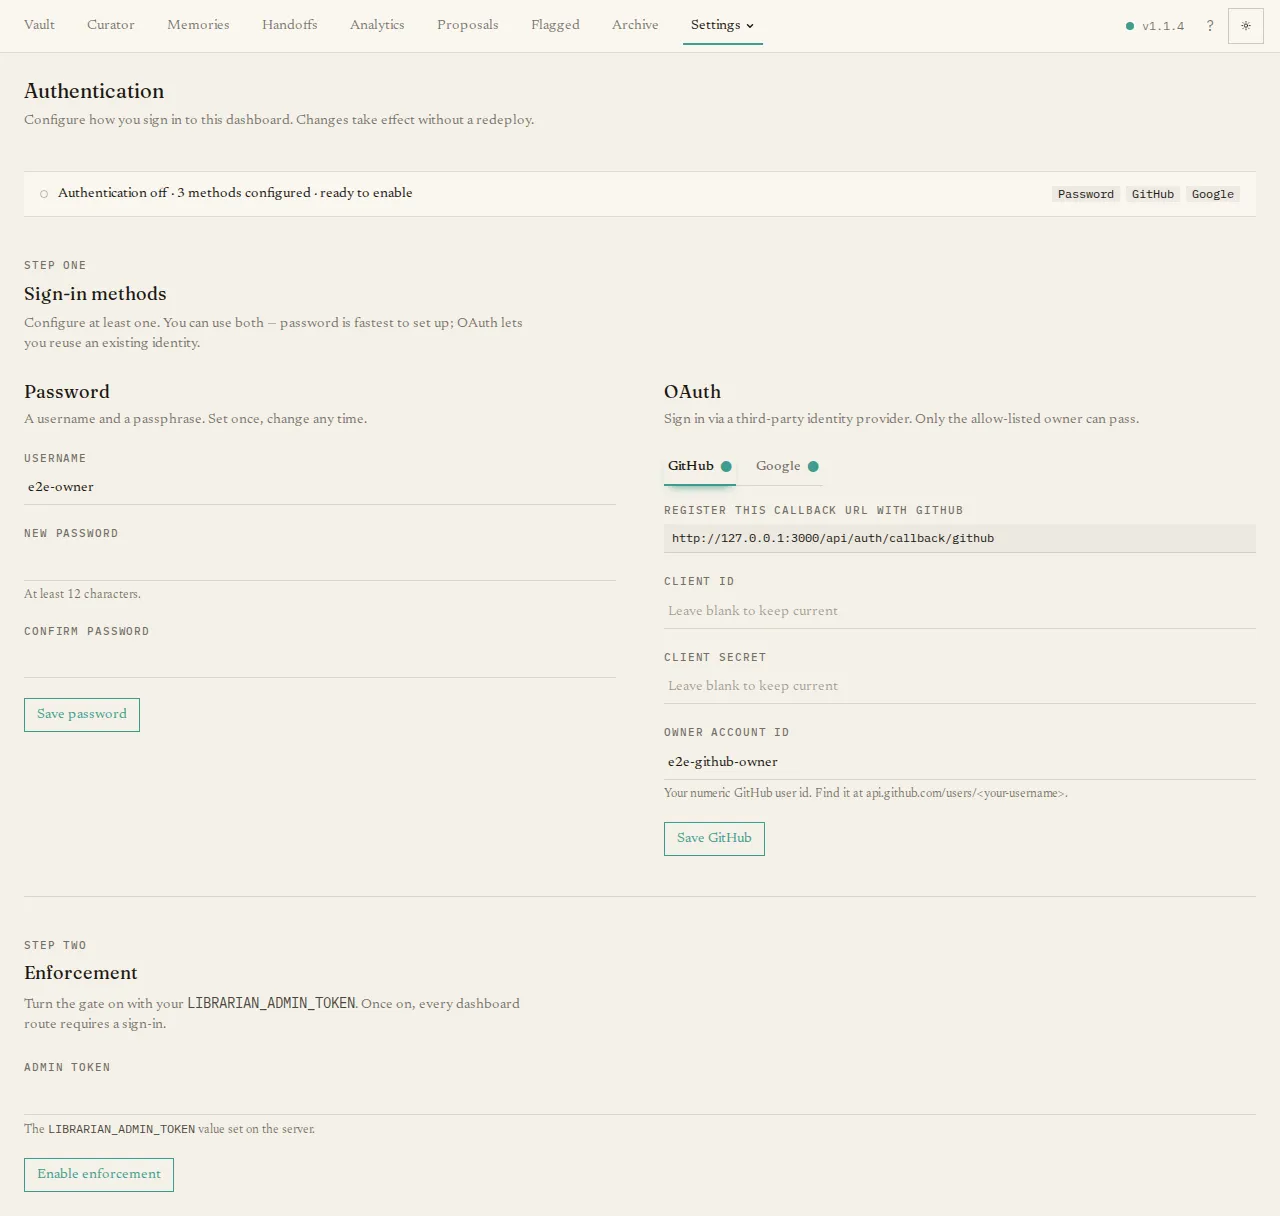
Settings → Auth controls whether the dashboard requires you to sign in. It is off by default and strongly recommended for any deployment reachable from the internet. A status strip shows the current state and which sign-in methods are set up.
Setting it up is two steps. First, add at least one sign-in method — a username and password, and/or GitHub or Google login (the page shows the exact callback URL to register for each). Then turn enforcement on. Once enabled, every dashboard page asks an unrecognised visitor to sign in, and the change takes effect immediately with no redeploy. If you ever lock yourself out, you can recover from the server’s command line — see Authentication & secrets.
Primer
Section titled “Primer”Settings → Primer is a single editor for the briefing every agent loads at
the start of a session (the file vault/primer.md). It teaches your agents the
core habits — recall before answering, remember durable facts, the handoff and
private-mode rules. Edit it and Save; the server enforces a 2 KB limit so it
stays short, and every save is tracked in history. Keep it generic guidance — never
put secrets or person-specific detail in it, because it is served to agents and is
readable without a token.
Curator
Section titled “Curator”Settings → Curator is where you configure the curator’s language model and when it runs. At the top you manage LLM providers — add a provider (such as Anthropic or OpenAI) with its credentials, test the connection, and edit or remove it. Below that are three tabs: Intake files submissions, Grooming tends the existing collection, and Chronicle writes a weekly searchable review. Each tab contains its schedule or trigger controls, model selection (with the job’s output limit and thinking level), run history, and a Run now button. Chronicle’s model is optional: its factual digest is always available.
For the bigger picture — what the two jobs do and how to tune them — see Configuring the curator. For the weekly review specifically, see The Chronicle.
Tokens
Section titled “Tokens”Settings → Tokens manages the agent tokens your tools use to authenticate. Generate a token with a label; its secret value is shown once, so copy it into your tool’s config right away. The table of active tokens lets you revoke any of them, which takes effect immediately. Minting a token per agent (rather than sharing one) is the recommended approach — it lets you attribute and revoke per tool.
Connect
Section titled “Connect”Settings → Connect helps you feed The Librarian from places other than a coding agent — a browser extension, an iPhone/iPad Shortcut, and an Android recipe — so you can clip an article or page into your references from anywhere. It walks you through installing each, mints the capture token they need (shown once), and shows the server URL to paste in. A table lists the capture tokens you have issued, each with a Revoke button.
Captures
Section titled “Captures”Settings → Captures is a read-only log of those clip-from-a-device attempts. It shows recent captures with their time, source URL, and status; successful ones link to the reference that was filed, and failed ones show a (redacted) error and the source so you can try again by hand. It also flags how many recent captures failed.
Backups
Section titled “Backups”Settings → Backups drives backing up your vault to a private GitHub repository. A health strip shows when the last backup succeeded (or the error if it failed). You configure the target repository and its credentials, can Backup now on demand, and see a short history of recent backups. A restore section explains how to pull the latest backup back in. Backups and restores are walked through end-to-end in Backups & restore.
Dashboard
Section titled “Dashboard”Settings → Dashboard holds instance-level options — currently server
auto-update. The toggle and cadence (daily or weekly) are settings: they tell
the host’s update timer what to do, but the dashboard cannot perform an update
itself — a server can’t recreate its own container from inside it. Auto-update
actually runs once the host timer is installed, on the machine running the
server, as the user who ran server up:
librarian server autoupdate enableThe page also shows the current version, the latest available, and when auto-update last ran. The full walkthrough — including what to check when auto-update seems to do nothing — is in Automatic updates.